Posted on

Clever Solutions: Maximising Space in Your Small Bathroom Renovation

Luma.Shop Online DIY Home Renovations

Clever Solutions: Maximising Space in Your Small Bathroom Renovation

Are you facing the challenge of renovating a compact bathroom? There are innovative ways to make the most of your limited space without compromising on style or functionality. We’re going to share five innovative ways to maximise space in your small bathroom renovation.

Wall-Mounted Storage

Embrace vertical space by installing wall-mounted shelves, cabinets, or baskets. These storage solutions not only free up floor space but also keep your essentials neatly organised and within easy reach. Consider opting for sleek, minimalist designs to maintain a sense of openness in your bathroom.

Optical Illusions with Mirrors

Mirrors are a powerful tool for creating the illusion of a larger space and adding a touch of glamour. Install a large mirror or an array of smaller mirrors to reflect light and visually expand the room. Alternatively, mirrored cabinets are a useful way of providing storage while giving the illusion of more bathroom area.

Compact Fixtures and Fittings

Choose space-saving fixtures and fittings specifically designed for small bathrooms. Look for slimline toilets, corner sinks and narrow vanities that are proportionate to the size of your space. Wall-hung toilets and sinks not only save floor space but also give your space a modern look and feel.

Glass Shower Screens

Replace shower curtains with sleek glass shower screens to open up the visual flow of your bathroom. Frameless or semi-frameless designs create a seamless look and allow natural light to penetrate the space, making it feel more expansive. Consider installing a walk-in shower to eliminate the need for a bulky enclosure altogether.

Multi-Functional Furniture

Incorporate furniture pieces that serve more than one purpose. For example, a vanity with built-in storage or a mirrored cabinet with integrated lighting can maximise both utility and space efficiency. A mirrored shaving cabinet is a great way for extra storage without compromising floor space.

Tackling a small bathroom renovation shouldn’t feel like a massive challenge. By putting these five clever strategies into action, you can turn your snug space into a stylish and practical retreat. With a bit of thoughtful planning and some smart design decisions, you’ll be surprised at how much you can accomplish in even the cosiest of bathrooms.

Order everything on your bathroom renovation checklist here:

Visit www.luma.com.au

Posted on

Update Your Kitchen Handles: A Guide to Measuring, Choosing and Installing New Handles

Luma.Shop Kitchen Renovation DIY Online

Update Your Kitchen Handles: A Guide to Measuring, Choosing and Installing New Handles

Transforming your kitchen’s look can be as simple as updating the handles on your cabinets and drawers. This small change can have a big impact, refreshing the entire space. Here’s a step-by-step guide to measuring, choosing, ordering online, and replacing your kitchen handles, ensuring a result you’ll love.

Step 1: Measuring for the Perfect Fit

The first step in your kitchen handle upgrade is to measure the existing handles. This is crucial for ensuring the new handles fit perfectly. Use a tape measure to determine the distance between the screws on your current handles, measuring from the centre of one screw to the centre of the other. Record these measurements in millimetres for the most accuracy.

Be sure to measure all doors and drawers as your kitchen may contain a range of handle sizes.

Step 2: Choosing Your New Handles

Now comes the fun part – choosing your new handles! Consider the style and finish that will best complement your kitchen’s design. Do you prefer a modern look or something more traditional? Would brushed nickel, matte black, or polished brass best suit your cabinets? Online stores like Luma.Shop offer a wide range of options, making it easy to find handles that match your personal style and kitchen’s aesthetic.

Step 3: Ordering Online

Once you’ve selected your new handles, it’s time to order them online. This process is convenient and allows you to browse a vast selection from the comfort of your home. When ordering, double-check your measurements and the quantity you need. Most online retailers, including Luma, provide product details to assist.

Step 4: Installing Your New Handles

With your new handles collected or delivered, it’s time to install them. This DIY task is straightforward and can be completed with just a screwdriver or drill. Remove the old handles, align the new ones with the existing holes, and screw them in place. It’s a satisfying process that instantly upgrades the look of your kitchen.


Enjoying the Results

The final step is to step back and admire your handiwork. Replacing kitchen handles is a simple yet effective way to refresh your space. It’s amazing how such a small change can make a big difference, giving your kitchen a new lease on life. You’ll appreciate the updated look every time you’re in the kitchen, and it’s a change that can even increase the appeal of your home.

Updating your kitchen handles is a quick, cost-effective way to revitalise your kitchen. By carefully measuring, selecting, ordering, and installing new handles, you can enjoy a refreshed kitchen that brings you joy every day.

Posted on

Choosing the Right Sink for Your Kitchen or Bathroom Renovation

Luma.Shop Kitchen Renovation DIY Online

Choosing the Right Sink for Your Kitchen or Bathroom Renovation

When it comes to kitchen and bathroom renovations, selecting the right sink is a decision that combines practicality with style. The sink is not just a functional element; it’s a central piece that can define the room’s aesthetic and usability. Whether you’re going for a modern, traditional, or rustic look, there are several factors to consider.

Material Matters

The first step in choosing the right sink is selecting the material. For kitchens, stainless steel remains a popular choice due to its durability and ease of maintenance. However, if you’re looking for something more unique, consider options like granite composite, which is known for its resistance to scratches and chips. For bathrooms, porcelain is a classic choice, offering a sleek and clean appearance, while materials like glass or stone can add a luxurious touch.

Size and Configuration

The size of your sink should align with the scale of your room and the countertop. In kitchens, large, deep basins are ideal for heavy-duty tasks, whereas smaller, shallower sinks may suffice in less busy spaces. Double sinks can be a great choice for multitaskers, providing separate areas for washing and rinsing. In bathrooms, consider how much counter space you need and whether you prefer a single or double sink.

Graphite Sink
Pictured: Graphite undermount sink Franke KBG110-74ON Kubus Onyx
Franke BWX120 Sink
Pictured: Franke BWX120-41/27 Bowl with Prep Centre in Stainless Steel

Style and Design

Sinks can be a statement piece, especially in modern designs. Undermount sinks, where the rim is not visible above the countertop, offer a sleek look and make cleanup easier. Farmhouse or apron-front sinks add a rustic, charming element to kitchens. For bathrooms, vessel sinks, which sit on top of the counter, can serve as a focal point and come in various shapes and materials.

Taps and Fixtures

The right tap or faucet can complement your sink beautifully. Consider the finish and shape of your faucets and how they harmonise with the sink. In bathrooms, space-saving designs might be ideal, while in kitchens, you might opt for faucets with pull-down sprayers for added functionality

Choosing the right sink for your kitchen or bathroom renovation is about balancing functionality with aesthetics. Consider the material, size, style, and accompanying fixtures to find a sink that not only meets your practical needs but also enhances the overall design of your space. Remember, the right sink can elevate your renovation project, turning an ordinary room into a stunning and efficient space. To see our entire range of sinks and tapware visit our website.

Mixer Tap
Pictured: Franke TA7300 Verona Sink Mixer in Matte Black
Posted on

Kitchen Styles We Expect We’ll See in 2024

Designer kitchen

Kitchen Styles We Expect We’ll See in 2024

As we step into 2024, the world of kitchen design continues to evolve, blending functionality with aesthetics to create spaces that are both inviting and practical. This year, we’re seeing a diverse range of styles, each catering to different tastes and lifestyles. Let’s dive into some of the most popular kitchen styles of 2024.

Minimalist Modern:

The minimalist trend remains strong in 2024, with kitchens embracing clean lines, uncluttered spaces, and a monochromatic colour palette. This style often features integrated appliances and hidden storage solutions, making it ideal for those who cherish simplicity and order. Materials like stainless steel, glass, and polished concrete are prevalent in these kitchens.

Farmhouse Chic:

Contrasting the modern minimalist, the farmhouse chic style continues to charm with its rustic and cosy feel. This style is characterised by natural wood finishes, vintage accessories, and open shelving. Farmhouse kitchens often feature a large, welcoming island and are perfect for those who enjoy a more traditional, homey kitchen environment.

Luma.Shop Designer kitchen renovation
Designer kitchen

Sustainable and Eco-Friendly:

Sustainability has become a significant focus in kitchen design. Eco-friendly kitchens in 2024 feature recycled materials, energy-efficient appliances, and a design that emphasises natural light. Homeowners are increasingly choosing sustainable woods and biodegradable materials, reflecting a growing consciousness about environmental impact.

Industrial Edge:

The industrial style has evolved in 2024, blending raw elements like exposed brick and metal with sleek, modern touches. These kitchens often feature high ceilings, large windows, and a mix of vintage and contemporary furniture. It’s a style that suits those who love a loft-like, edgy aesthetic.

Smart Tech Integration:

Technology integration is no longer a luxury but a standard in many 2024 kitchens. Smart kitchens are equipped with devices that can be controlled via smartphones or voice commands, offering convenience and efficiency. From smart ovens that can be preheated remotely to fridges that notify you when you’re running low on essentials, technology is reshaping how we interact with our kitchens.

Global Inspiration:

With a growing appreciation for global cultures, kitchens in 2024 are increasingly featuring design elements inspired by different parts of the world. Moroccan tiles, Scandinavian simplicity, and Japanese minimalism are just a few examples of how global influences are making their way into kitchen design.

Designer kitchen

Whether you’re a fan of the sleek and modern or the warm and rustic, there’s a kitchen style out there that’s perfect for you. As we continue to spend more time in our kitchens, these spaces are becoming a true reflection of our personal styles and requirements. Visit our gallery page for more inspiration.

Posted on

Breathe New Life into Your Kitchen with Cabinet Door Refurbishment

Kitchen table

Breathe New Life into Your Kitchen with Cabinet Door Refurbishment

Renovating your kitchen doesn’t always mean a complete overhaul. Sometimes, the smallest changes can make a significant impact. When you’re yearning for a fresh new look in your kitchen, replacing all your kitchen doors might be the ideal solution. Not only is it cost-effective, but it also allows you to bring in a fresh aesthetic without the commotion of a full-fledged renovation. Let’s dive into the many reasons why revamping your kitchen doors can be a golden opportunity to rejuvenate your kitchen space.

Sprucing Up the Heart of Your Home

The kitchen is often referred to as the heart of the home. It’s where we gather, create meals, and share moments with family and friends. Hence, keeping it updated and visually appealing is essential. By focusing on the cabinet doors alone, you can introduce a remarkable change in the overall ambiance of the kitchen.

1.Quick and Easy

At Luma, we like to say Click and Easy – because refreshing the whole look of your kitchen is as easy as selecting doors and handles, ordering online and then installing with some hardware (also able to be ordered from us).

Luma-DIY-Kitchens
Wooden Kitchen Handles

2.Move With Trends

Trends can change quickly, but that doesn’t mean you need to renovate your entire kitchen more frequently. With a quick and efficient way to order custom doors and fittings online through Luma, you can update your kitchen to bring new trends and colours into your home more frequently. We’re seeing a lot of sage green at the moment!

 3.Customisable Options

Updating kitchen doors provides a canvas to showcase your style. Whether you opt for a modern, sleek look with high-gloss finishes or a rustic, vintage style with timber-look laminate, the options are endless. You can even experiment with glass insets, unique handles, or unique colours to personalise your kitchen further.

A kitchen door refurbishment is a fantastic way to breathe new life into your kitchen. With a little creativity and effort, you can transform your kitchen into a space that reflects your style and personality. Luma can make it even easier to breathe life into your new space by manufacturing your cabinetry on-site and delivering it to you, ready for install. Visit luma.com.au to see our full range of doors and handles.

Posted on

Designing a functional kitchen

Luma-Shop-DIY-Renovations-Functional-Design

Designing a Functional Kitchen

When it comes to designing your dream kitchen, you don’t just want a space that looks good – you want it to work functionally, too. Luckily, achieving a functional kitchen design is a lot easier than you might think. To help you out, we’ve compiled a list of handy tips for creating a space that’s sure to be beautiful and functional.

1.   Plan your space

The first thing to think about is how you’ll use your kitchen. Do you consider yourself a masterchef or will you be cooking home-cooked meals every night? Then you’ll want ample bench and storage space. Are you more a sit at the bench and eat kind of family? Or, do you want space for your kids to do their homework without being away from what you’re doing? Then an island bench with seating might be for you.

2.   The kitchen triangle

Have you ever heard of a kitchen triangle? It’s a clever way to ensure a kitchen’s storage (fridge), cleaning (sink) and cooking (stove) areas are connected a comfortable distance away from one another, without any obstacles between them. Achieving this is one way to ensure your kitchen enjoys a workable flow.

Luma-Shop-DIY-Renovations-Kitchen-Triangle

3.   Let there be light

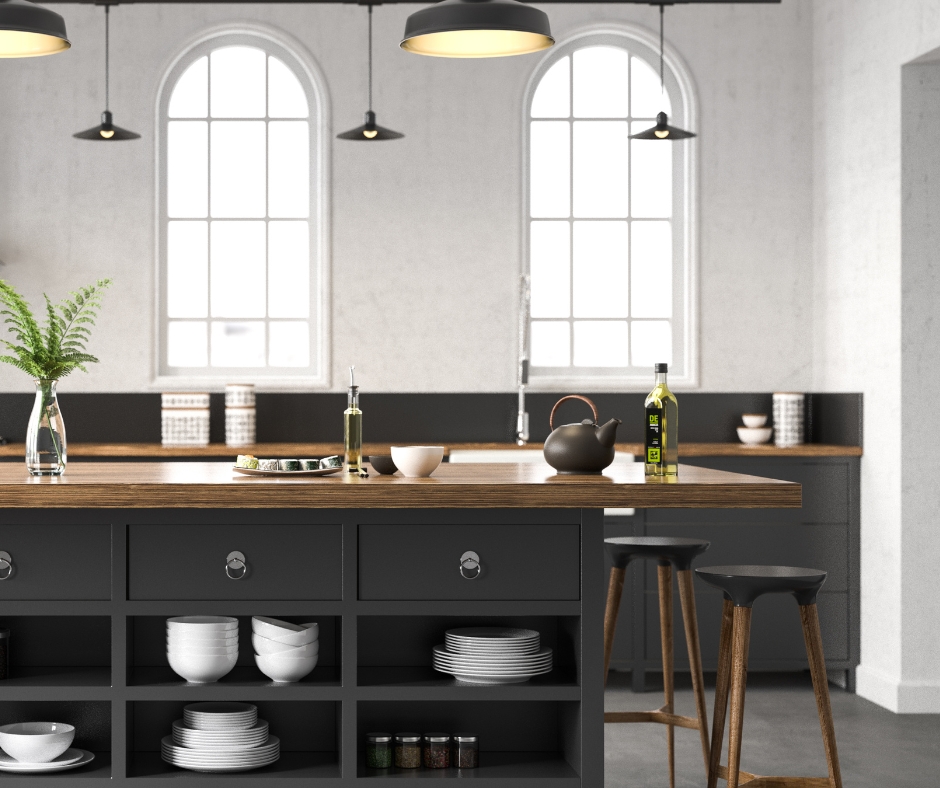
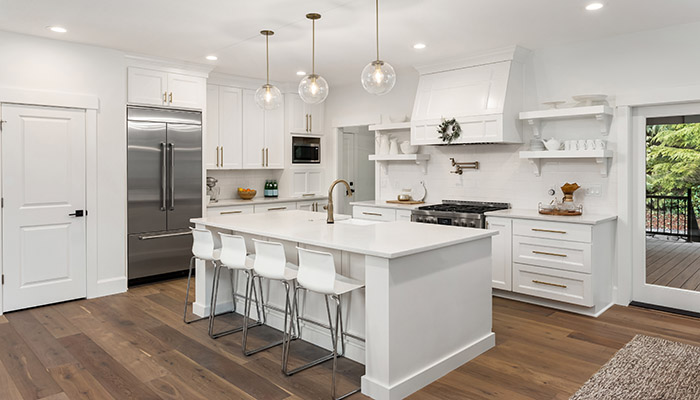
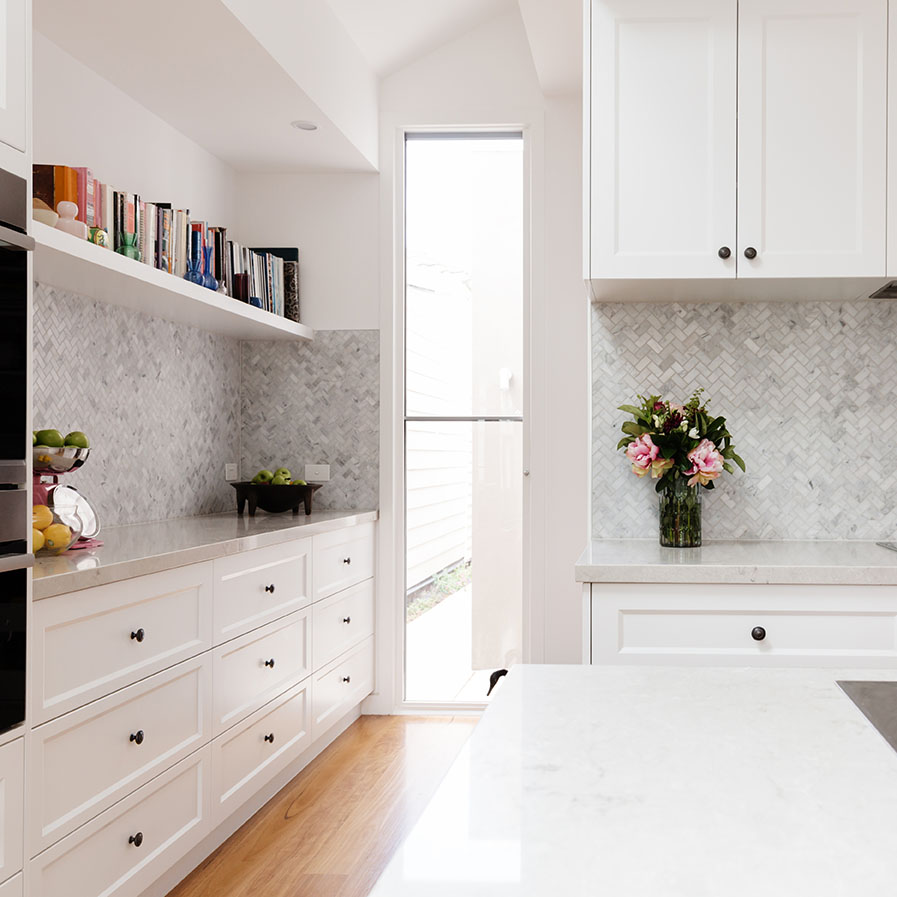
Nothing creates a cheerful space quite like natural light, which also helps your kitchen to look bigger, too. When planning your kitchen, don’t forget to incorporate plenty of windows, or a skylight is a great way to make the most of the natural light.

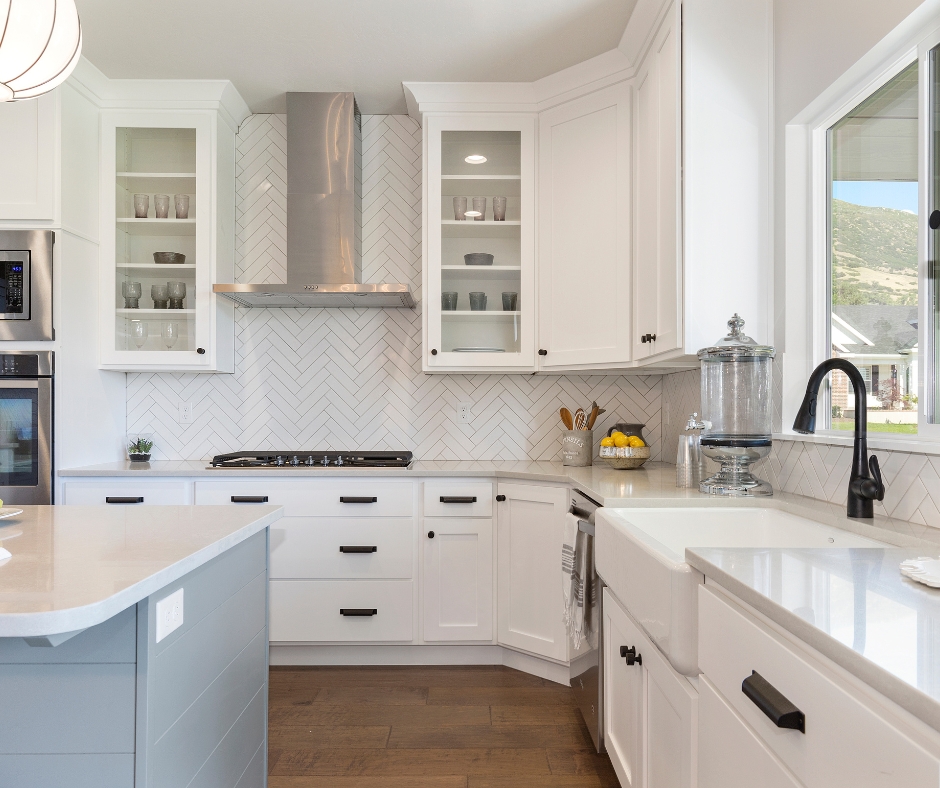
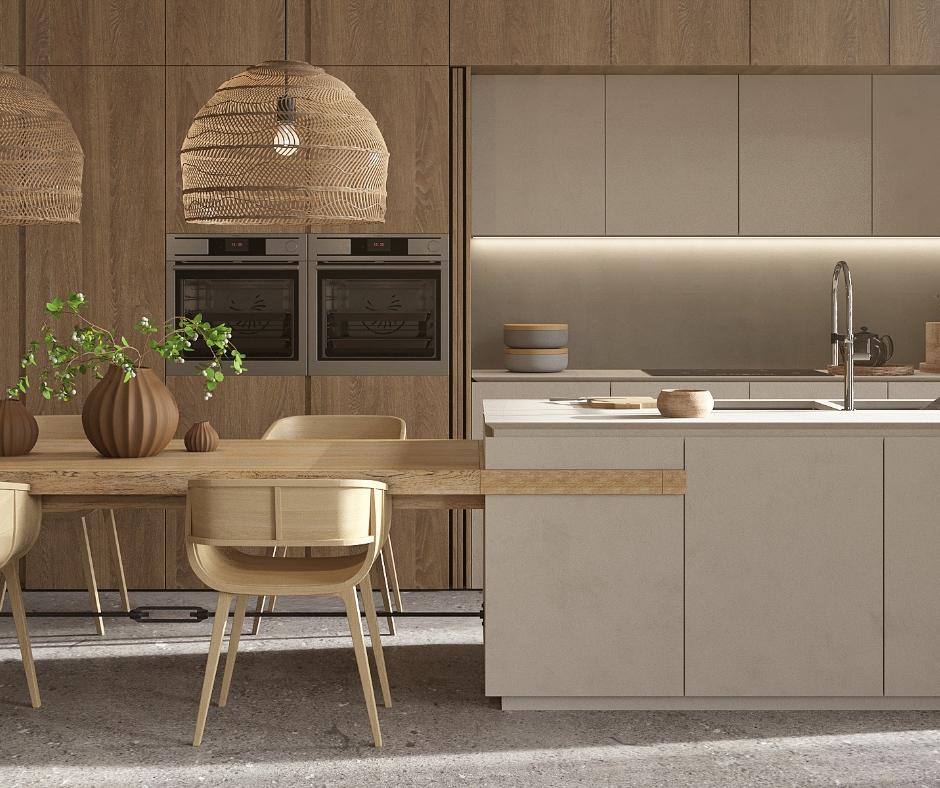
Now, what about lighting for night time? For a kitchen to be a functional space, you need to have good task lighting over the:

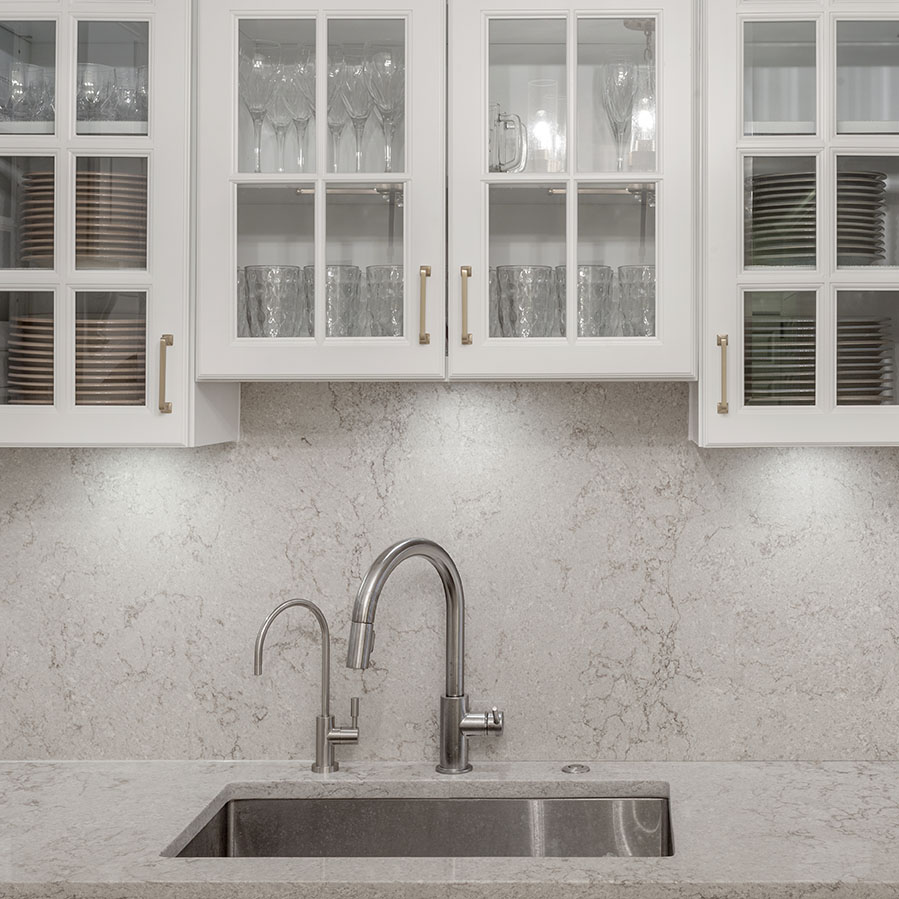
  • sink for cleaning up;
  • counter area for preparing;
  • stove top;
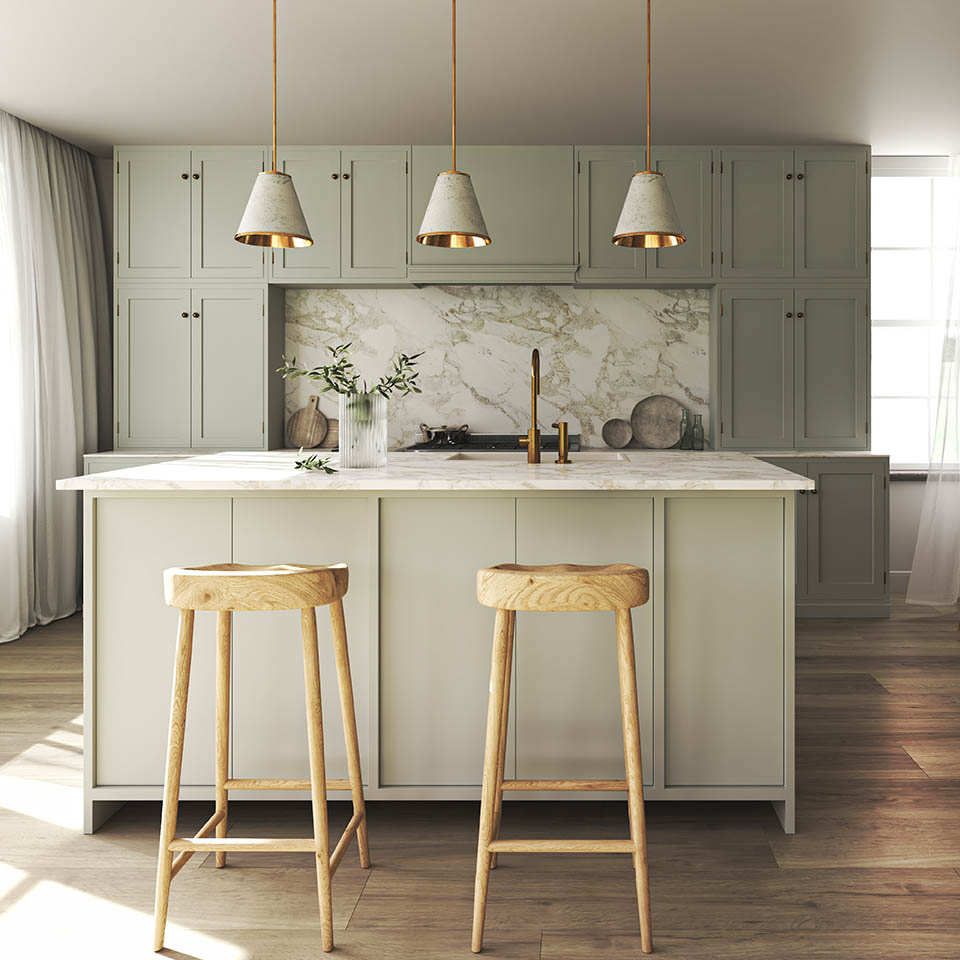
  • kitchen island, especially if it is being used as a casual dining area; and
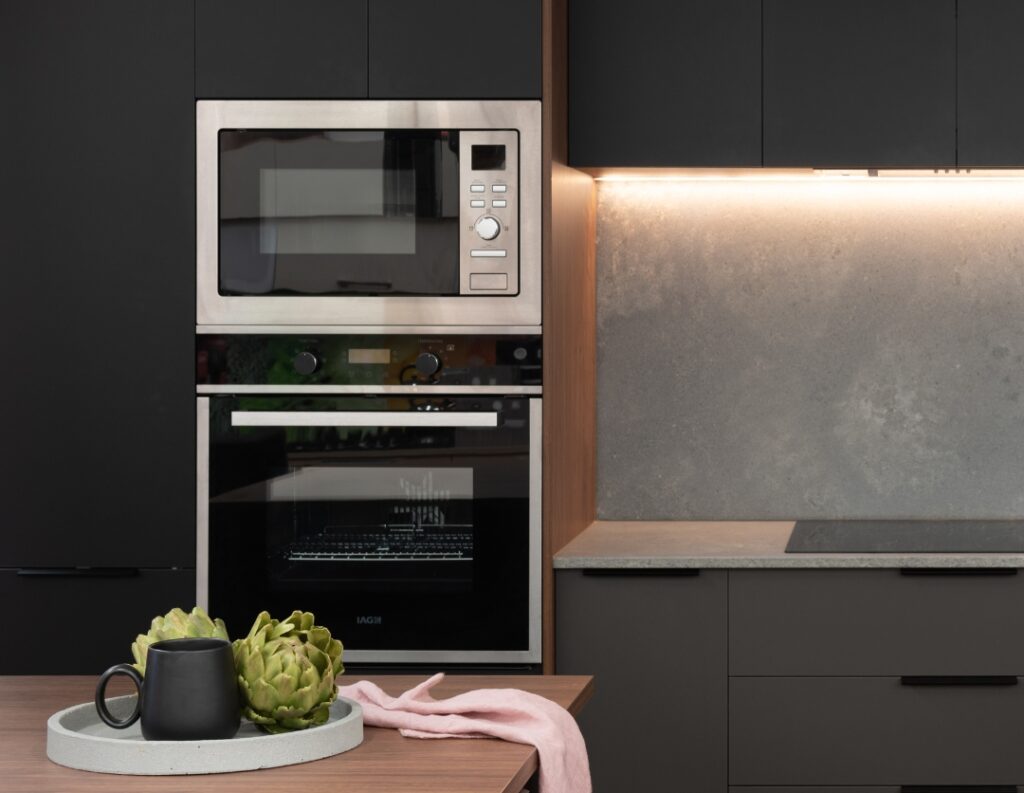
  • appliances like the microwave, kettle and toaster.

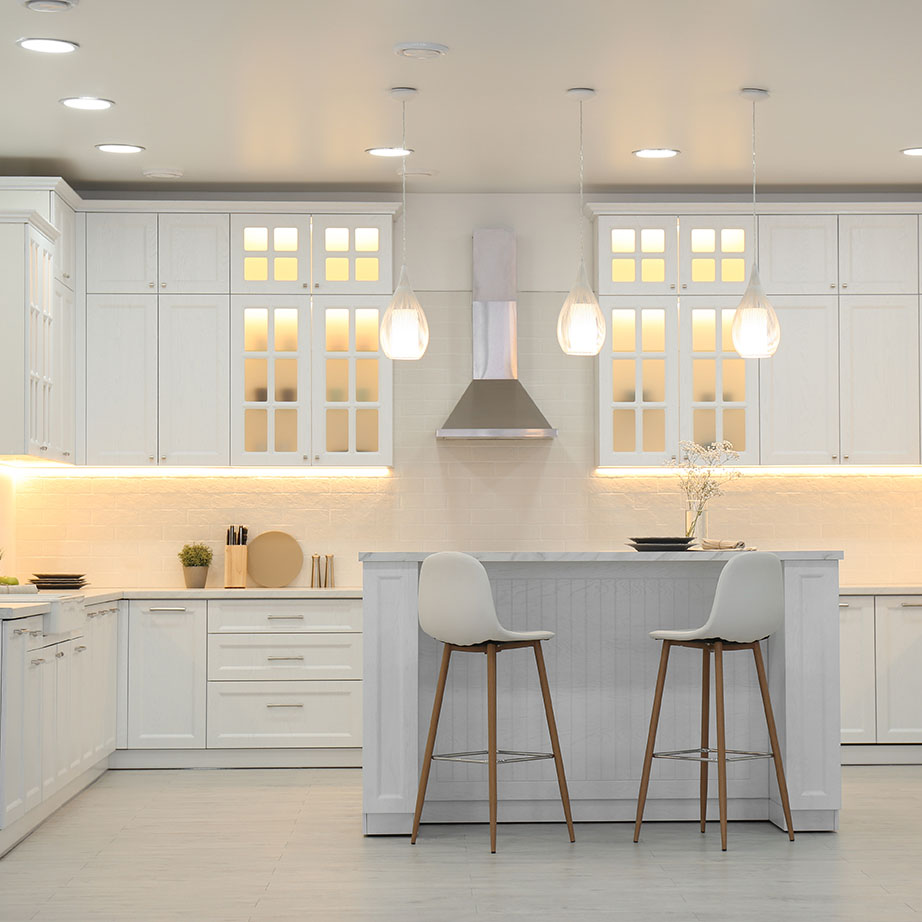
To add some warmth into your kitchen space, consider having some ambient lighting. This is especially important for when you’re not cooking but want to light up your kitchen space. Soft ceiling lights, cabinet lighting or even lamps can help achieve this effect.

Luma-DIY-Kitchen-Renovation-Functional-Design

4.   Clever storage

No kitchen is complete without plenty of clever storage. How you achieve this is largely related to the size of your kitchen. If you have a smaller kitchen where space is limited, you’ll need to be smarter about how you utilise the available room – things like extra deep drawers for pots and pans and corner cabinets with carousel inserts can make a big difference.

Luma-Shop-DIY-Renovations-Clever-Storage
 

Take your kitchen to a new level with a DIY kitchen from Luma. Shop now

Posted on

Embrace the Freshness of Spring: Bringing Elements of the Season into Your Kitchen Renovation

Luma-DIY-Kitchens-Blog-Spring-Kitchen

Embrace the Freshness of Spring: Bringing Elements of the Season into Your Kitchen Renovation

Luma-DIY-Kitchen-Renovation-Blog-Spring-Elements-Blossoming-Colours

As Australia wakes up from its winter slumber, there’s a new energy in the air. Spring is a season of transformation, and what better way to welcome this spirit into your home than through a kitchen renovation? Infusing your kitchen space with elements of spring can create an atmosphere of vibrancy, growth, and rejuvenation. Here’s some of our ideas for how you can bring the essence of spring into your kitchen design, turning it into a haven of seasonal beauty and functionality.

Blossoming Colours
Just as flowers bloom in a myriad of colours, your kitchen can come alive with a fresh palette inspired by spring. Consider incorporating soft pastels like mint green, sky blue, and pale pink into your cabinetry, walls, or accents. These colors can evoke a sense of calmness and new beginnings. Complement these pastels with pops of vibrant hues like sunny yellow or lively coral to mimic the vivid flowers of spring.

Nature-Inspired Textures
Spring is all about embracing the textures found in nature. Introduce these elements into your kitchen renovation by opting for natural materials like wooden cabinets, stone splashbacks, and woven accessories. These textures not only bring a touch of the outdoors in but also add warmth and depth to your space.

Luma-DIY-Kitchens-Blog-Spring-Kitchen-Natural-Textures
Luma-DIY-Kitchens-Blog-Spring-Kitchen-Lighting

Abundant Light
The increasing daylight of spring can be mirrored in your kitchen design by maximizing natural light. Consider installing larger windows or opting for sheer curtains that allow sunlight to filter through, illuminating your space. If your kitchen layout doesn’t allow for more windows, strategically placing mirrors can help bounce light around the room.

Floral Flourish
Flowers are the quintessential symbol of spring. While real flowers can bring temporary beauty, you can incorporate floral patterns into your kitchen’s design to create a lasting impression. Consider a floral-printed glass splashback, wallpapers, or even upholstery for your dining area. This adds a touch of elegance and a nod to the season’s blooms.

Open Shelving for Display
Spring is a time of growth and openness. Reflect this in your kitchen by opting for open shelving instead of closed cabinets. This not only encourages you to showcase your beautiful kitchenware but also creates a sense of airiness and expansiveness in the space.

Fresh and Fragrant
Infuse your kitchen with the scents of spring by incorporating herbs and plants. A small indoor herb garden on your windowsill not only provides fresh ingredients for your cooking but also adds a burst of greenery to your space. Hanging planters or potted plants can also add a natural touch to your kitchen design.

Luma-DIY-Kitchens-Blog-Spring-Kitchen-Open-Shelving
Luma-DIY-Kitchens-Blog-Spring-Kitchen-Functional-Flow

Functional Flow
Just as nature seamlessly transitions from one phase to another, your kitchen design should facilitate a smooth flow between different areas. Ensure that your kitchen layout allows for easy movement and accessibility, promoting a sense of harmony and organisation.

A kitchen renovation offers the perfect opportunity to incorporate the spirit of spring into your home. By embracing colours, textures, patterns, and elements inspired by nature, you can create a kitchen design that not only reflects the season’s vitality but also provides you with a space to savor its beauty year-round.

This Spring, let Luma’s kitchen décor ideas infuse your home with a fresh and inviting atmosphere for you and your loved ones to enjoy together. 

Take your kitchen to a new level with a DIY kitchen from Luma. Shop now

Posted on

How to choose the right splashback for your new kitchen

Luma-DIY-Kitchen-Renovations-Blog-Splashbacks

How To Choose the Right Splashback for Your New Kitchen

Designing the perfect kitchen for you home leaves you with loads of decisions to make. One of the stand-out  in any kitchen is the kitchen splashback and something we think should be at the top of your list when it comes to planning your new space.

So, where do you start? Here’s our top tips for getting your splashback right.

Decide on a benchtop material first

If you’re feeling a little overwhelmed by the huge range of splashback materials on offer? Well, you’re not alone. To make things easier, it helps to choose your benchtop first.

There are generally less materials and finishes available for benchtops, making your choice a lot easier. Once you’ve chosen the right benchtop colour and material for your kitchen, you can then go about finding the right splashback for you.
Luma-DIY-Kitchen-Renovation-Blog-Splashbacks-Benchtop

Stick to a budget

To help narrow down your choice even further, it pays to know what your budget is. And, most importantly, stick to your budget.

If you’re looking for a cost-effective splashback look at tiles, laminate and acrylics. For something a little more expensive, but really stunning, glass and stainless steel splashbacks are a great option. A trend that’s been emerging lately is the continuation of your benchtop material into your splashback, most common when you have a stone benchtop. This statement splashback will wow everyone who sees it but it is a little more costly, so it’s important you’ve got it factored into your budget from the beginning.
Luma-DIY-Kitchen-Renovation-Blog-Splashbacks-Budget

Choose a colour

Now we get into the best part. Do you want your splashback to really stand out in your kitchen, or are you happy to add pops of colour eith your  accessories? If you want a bold splashback, consider keeping your benchtop material as more of a neutral tone, to avoid clashes of colour.

Picking a colour scheme can also make finding the right splashback for your kitchen that much easier.

Luma-DIY-Kitchen-Renovation-Blog-Splashbacks-Colour

Consider the maintenance

Every splashback material comes with its own set of maintenance requirements. For many splashbacks, a simple clean with a damp cloth should keep everything looking good, yet some materials will require more specialised care. A timber splashback, for example, will need to be properly sealed before installation, while glass and stainless steel splashbacks will need to be regularly cleaned to avoid greasy marks and fingerprints building up. It’s definitely something to consider!

Luma-DIY-Kitchen-Renovations-Blog-Splashbacks-Maintenance

Check out what others are doing

Still not sure which splashback will work best for your kitchen? Then why not do a bit of mystery shopping? Check out kitchen showrooms to see what they’ve done, visit the Laminex showroom or simply check out what’s going on in your friends and families home. That way you’ll know what you like before you get back to your DIY project.
 

Take your kitchen to a new level with a DIY kitchen from Luma. Shop now

Posted on

Tips for designing a white kitchen

Luma-DIY-Kitchen-Renovation-Blog-White-Kitchen

Tips for Designing a White Kitchen

If you’re looking for a design scheme that doesn’t seem to go out of trend and works in both open plan environments and for small kitchens then you can’t go wrong with an all-white kitchen. A white kitchen creates a light and airy space that allows you to incorporate any accent colour imaginable. The great thing about white kitchens and the restricted palette is that it’s easier to unify cabinets, benchtops, lighting, hardware and flooring into one cohesive look. From classic cooking spaces to modern kitchens, a neutral colour palette will work for all styles. A white kitchen is far from boring – we’ve put together a few tips for designing your white kitchen to ensure it’s lively and has depth and dimension.

1. Lighting is so important 

The lighting colour you choose can make a huge impact on the aesthetics of your kitchen. If it’s too yellow it could drastically distort the colour of your kitchen. Warmer bulbs will off a cosy and casual vibe, the type of lighting synonymous with lounges and restaurants, so you’ll need to lean towards cooler bulbs in your all-white kitchen. Cool white lighting is bright, vibrant and is best for an all-white kitchen if you choose bulbs toward the blue end of the colour spectrum.

Alternatively, opt for daylight lighting which is bright, powerful and replicates real daylight. If you’re able to, we recommend taking advantage of natural light from a window or skylight, otherwise LED daylight bulbs will give a true, fresh look.
Luma-Shop-DIY-Kitchen-Renovation-White-Kitchen-Lighting

2. Don’t leave handles to the last minute

Your choice of kitchen door handles can have the greatest impact and greatly change the overall look of your new kitchen. They’re an important detail that is often overlooked and left to the last minute. The handles you choose have the power to change the feel of your kitchen so it’s important to consider the style you are aiming for when making this choice.

In an all-white kitchen, the handles present a perfect opportunity for you to add a pop of colour or make a statement. Whilst statement handles look fantastic, it’s important to consider your design before making a decision – make sure thy suit your overall kitchen style. If you’re opting for something simple or understated, silver or gold handles are popular in white kitchens and create a sleek, cohesive look.

View our gallery to see a large selection of handles.

Luma-DIY-Kitchen-Renovation-Blog-White-Kitchen

3. Layer different shades of white

Not all whites are created equal. Mixing up the shades of whites can create a beautiful look but it’s important to remember to stick to one undertone. Understanding undertones is important when combining different shades. Warm tones will always work best with other warm tones, and same for cool with cool. Warm tones create a yellow look, while cool tones give a blue look so mixing these tones can disrupt the cohesiveness of your kitchen. We recommend choosing up to four shades of white to be used on different materials around your kitchen. This will add dimension and interest in the space.

Luma-DIY-Kitchen-Renovation-Blog-White-Kitchen

4. Reflect your personal taste in your island

An island is a standout feature in a kitchen and the perfect opportunity for you to demonstrate your personal style in an all-white kitchen. If you want your island to be a little unique, opt for an unusual shape, introduce a new material to the cabinetry or benchtop or add a pop of colour.

If you want to maintain the all-white décor, marble is a great way of making a statement whilst maintaining the all-white look. It’s fresh, clean, on-trend, visually appealing and compliments an all-white kitchen perfectly.
Luma-DIY-Kitchen-Renovation-Blog-White-Kitchen

5. Add personality

A kitchen without any colour could have people saying your kitchen lacks personality. But there are many features that can be used to incorporate colour, a patter or different material into your space.

Your splashback has the potential to be a feature in your space by using a bold colour, striking image or pattern. If you want to keep your splashback white, make it a great focal point by using a pattern or textured material, such as mosaic stone, a three-dimensional tile, painted brick or a herringbone pattern.

You can also add some interest by including a splash of colour through your kitchen accessories. Think coloured seating, furniture, cushions, hardware, accessories and plants.

Another great way to add some personality to a white kitchen is in your cabinet door choice. There are a wide range of options to choose from. View some of the materials and range here.
Luma-DIY-Kitchen-Renovation-Blog-White-Kitchen
 

Take your kitchen to a new level with a DIY kitchen from Luma. Shop now

Posted on

Our best tips for keeping your new kitchen clean 

Luma-Kitchens-DIY-Kitchens-Cleaning-Your-Kitchen

Our Best Tips for Keeping Your New Kitchen Clean

Walking into your brand-new kitchen when it’s first installed is a great feeling. But, if it’s not maintained properly it can quickly turn your feelings of love into something else. So here’s our best tips for thoroughly cleaning and maintaining your kitchen.

Cut The Clutter
Keeping your surfaces and sorting our your cupboards will not only make your kitchen look more tidy and organised, it also makes it easier to maintain. We suggest going through your cupboards and selecting items you no longer use and getting rid of them, then reorganise everything in a way that makes them easy to get to based on the frequency that you use them. Got broken or old, worn items? Now might be the time to get rid of them.

Luma-Kitchens-DIY-Renovations-Clean-Kitchen

Sort the Fridge and Pantry
Get your bin out and start chucking out the old food and leftovers. Check expiry dates and clean it all out. Then, start cleaning shelves to remove sticky spots and crumbs with a cleaning cloth and household cleaner. Now it’s time to organise your shelves in a way that makes sense to you with labels facing forward so they’re easy to grab when you’re in a hurry.

Hit The Hard Spots
Start checking the areas that aren’t necessarily at your eye-level or are out of reach. We’re talking the top of the fridge or the wall cabinetry, get in there with a duster and wipe over. Then, get stuck into the rangehood with some kitchen degreaser and don’t forget to clean any light fixtures you can get to.

Luma-Kitchens-DIY-Renovations-Clean-Hard-Spots

Appliances
Your oven, microwave and stovetop work hard throughout the year, and don’t get cleaned as often as they should.

You can clean your microwave with products you already have in your house, such as all-purpose cleaner or vinegar. Remove the turntable and wash it in the sink before cleaning out the microwave itself. Try an abrasive cream cleaner for stubborn food stains and splatters, thoroughly rinsing off with water. Do the same thing on your stove top, removing grates before spraying cleaner.

We know cleaning your oven is difficult and messy but it’ll look so good once it’s done. You can try an all-purpose cleaner or vinegar on your oven too for a sparkly shine.
Luma-Kitchens-DIY-Renvoations-Clean-Appliances

Clean All Surfaces
The just daily dust and dirt, not to mention the larger spills can leave benchtops and cabinet doors a little grubby over time.

We suggest starting by wiping down your benchops with a damp cloth and kitchen surface cleaner. They, get stuck into your cabinets with some warm, soapy water and don’t forget to do the insides of the cupboard doors too. We know you’ll be amazed at the difference this makes. If you’ve got an engineered stone benchtop from Caesarstone, Essastone, Dekton or any of our other great suppliers, you may have been supplied with a special cleaning product and instructions – be sure to follow these when cleaning for the best possible result.

Even though it’s where you do your cleaning, the kitchen sink is usually the dirtiest item in your kitchen. To keep it hygienic and fresh start by removing any sponges or dishes in the way, including the drain stopper. Take to the tap, drain and basin with a disinfectant spray, not forgetting the drainer or plug! Boil the kettle and pour it down the sink to clear any odour-inducing grime that’s made its way down the drain. Rinse out the rest of the sink with hot water then wipe over with a dry cloth to leave it sparkling.

Luma-Kitchens-DIY-Renovations-Clean-Surfaces

Wipe Down Windows
You’ve done all this work now don’t forget the windows! Give them a deep clean with warm, soapy water first. Then, grab some white vinegar and newspaper for a streak-free shine.

Luma-Kitchens-DIY-Renovations-Clean-Windows

Floors
The only thing left now is the floors. Start by vacuuming all the dust and debris you’ve swept onto the floor and then thoroughly mop depending on your flooring material.

To save yourself from doing an extensive clean too often, here’s some tips to maintain your now clean kitchen:

  • Clean as you go when cooking,
  • Wipe over bench tops in the evening and keep items on them to a minimum,
  • If you don’t have time for a thorough clean be sure to at least rinse dirty dishes to avoid lingering food smells,
  • Run the dishwasher at night so you wake up to clean dishes,
  • Keep your sink clean and empty,
  • Keep cloths and cleaning products easily accessible but out of sight,
  • Make the pantry and fridge clean out a regular occurrence.
 
Take your kitchen to a new level with a brand-new, custom-made, DIY kitchen from Luma. Shop now